About Me

My photo
Who am I? Wife. Mother of 2. "Newbie" to fitness. Personal Trainer-in-training. Lover of health. Fitness. Religion. Family. Gluten and refined sugar intolerant. Welcome to my journey. Learn with me.

Monday, June 27, 2011

Best Marinara Sauce Yet

I love the taste of fresh ingredients and this sauce was definitely no exception. I don't know if I would go so far as to say it was the "best" marinara sauce I have ever had but it was definitely good. And it is so easy to throw together that it is well worth making the sauce from scratch. Now all I need is some good mozzarella sticks to dip in this sauce...

The recipe is courtesy of Allrecipes.com and can be found at this site: http://allrecipes.com/recipe/best-marinara-sauce-yet/detail.aspx (picture courtesy of Soup Loving Nicole)


BEST MARINARA SAUCE YET
Adapted from Allrecipes.com

2 (14.5 ounce) cans stewed tomatoes (you can also used diced tomatoes)
1 (6 ounce) can tomato paste
4 tablespoons chopped fresh parsley (or 4 tsp. dried)
1 clove garlic, minced
1 teaspoon dried oregano
1 teaspoon salt
1/4 teaspoon ground black pepper
6 tablespoons olive oil (we cut this back to 3-4 Tbsp.)
1/3 cup finely diced onion
1/2 cup white wine (we substituted chicken broth)

In a food processor place Italian tomatoes, tomato paste, chopped parsley, minced garlic, oregano, salt, and pepper. Blend until smooth.

In a large skillet over medium heat sauté the finely chopped onion in olive oil for 2 minutes. Add the blended tomato sauce and white wine/chicken broth.

Simmer for 30 minutes, stirring occasionally.

Saturday, June 25, 2011

Chicken Sorrento

We are great balsamic vinegar lovers around here and if you are in the same boat and haven't tried this recipe yet you really need to! This new recipe was a great spin on spaghetti and the sauce had a great flavor. I really loved the addition of the balsamic vinegar - it was just enough that you could taste it but not enough to be too overwhelming. This dish came together extremely fast and my husband and little one loved it!

The original recipe and picture attached to this post are courtesy of Campbell's Kitchen and can be found at this site here.


CHICKEN SORRENTO
Adapted from Campbell’s Kitchen

1 tablespoon vegetable oil
1 pound skinless, boneless chicken breast halves
1 jar (24 ounces) of your favorite spaghetti sauce 
2 tablespoons balsamic vinegar
2 tablespoons chopped fresh basil leaves (or 2 tsp dried)
4 cups dry penne pasta, cooked and drained (use 3 cups if you like LOTS of sauce)
1/4 cup grated Parmesan cheese

1. Heat the oil in a 10-inch skillet over medium-high heat.  Add the chicken and cook for 10 minutes or until well browned on both sides.  Remove the chicken from the skillet.

2. Stir the sauce and vinegar in the skillet and cook for 2 minutes, stirring often.  Stir in the basil.  Return the chicken to the skillet.  Reduce the heat to low.  Cover and cook for 5 minutes or until the chicken is cooked through.

3. Slice the chicken.  Serve the chicken and sauce over the penne.  Sprinkle with the cheese.
 

Makes: 4 servings.

TIP! Be careful when browning your chicken that you don't dry it out. I think if you make sure your oil is nice and hot before adding the chicken in and don't let it cook too long that it will be alright.

Friday, June 24, 2011

Dripping Roast Beef Sandwiches with Melted Cheese

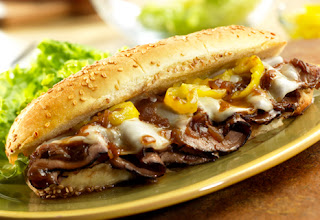
I may have mentioned already that the two cravings I cannot kick this pregnancy are lemonade and sandwiches. I am ALWAYS craving those two things. When I got this recipe in my inbox one day I knew right away that it would be a keeper around here. And boy was I right! It is extremely flavorful despite the very small ingredient list and came together super fast. I was definitely wishing that I had more room in my stomach for these bad boys! 

I have listed my adapted recipe below but if you would like to view the original you can find it and the link to this lovely picture here.


DRIPPING ROAST BEEF SANDWICHES WITH MELTED CHEESE
Adapted from Campbell’s Kitchen
Reminder Recipe! One Year Ago: Chicken With Lemon Sauce

1 can (10 1/2 ounces) Campbell's® Condensed French Onion Soup
1 tablespoon reduced sodium Worcestershire sauce
3/4 pound thinly sliced deli roast beef
4 soft hoagie rolls  
1 cup shredded mozzarrella cheese 
1/2 - 1 cup drained hot or mild pickled banana pepper rings

1. Heat the broiler on your oven.

2. Heat the soup and Worcestershire in a 2-quart saucepan over medium-high heat to a boil. Add the beef and heat through, stirring occasionally.

3. Divide the beef evenly among the rolls. Top the beef with the shredded cheese and place the sandwiches onto a baking sheet.

4. Broil for 2 - 3 minutes or until the sandwiches are toasted and the cheese is melted. Be careful to watch your sandwiches so they don't burn! Top each sandwich with amount of pepper rings that will best suit your taste buds. (Let's be honest though... banana peppers are AWESOME!)


5. Place remaining soup in a mug or small bowl. Dip sandwiches into sauce like you would a French Dip sandwich.

TIP! You can also spoon the soup over your sandwiches. This sounded like soggy sandwiches to me so I opted for the dipping strategy. Good thing too because my husband loved the sandwiches by themselves so much he didn't want anything to do with the extra soup!

Makes: 4 sandwiches.

Thursday, June 23, 2011

Ooey-Gooey Peanut Butter Brownies

Okay so when I first read the title of this recipe I thought that the ooey-gooey part referred more to "these are" instead of "you will be after making them." By far, this was the most frustrating recipe I have ever made in my entire life. Every part of the recipe was sticky and hard to work with and I was very tempted at times to start cursing at them like a sailor. That being said, however, they had a pretty good flavor to them and my guests definitely liked them.... so I am posting the recipe even though I don't know when I will bring myself to make them again. Here is hoping that you have more luck than I did with this one!

One thing to note - this is a recipe that was originally from Cooking Light. So although they look incredibly fattening they cut calories in the right places and aren't THAT bad for you.

The picture and recipe are courtesy of Our Best Bites and can be found here.

*AFTERTHOUGHT! I have been thinking about this recipe since I made it last night (because I am nerdy like that) and thinking about how much more I would like it if I made it with mint morsels/chips instead of peanut butter. Darn! Now I need to try and make it again!

OOEY-GOOEY PEANUT BUTTER BROWNIES
From Our Best Bites

3/4 C sweetened condensed milk, divided (fat-free is fine)
1/4 C butter, melted and cooled (1/2 stick)
1/4 C non-fat milk
1 box devil’s food cake mix (18.25 oz)
1 large egg white, lightly beaten
cooking spray
1 7 oz jar marshmallow creme (about 1 3/4 C)
1/2 C peanut butter morsels (not gonna lie, I used a very “heaping” 1/2 cup :)


Preheat oven to 350 degrees.

With an electric mixer, combine 1/4 cup sweetened condensed milk, milk, butter, cake mix, and egg white. Mixture will be very thick. Spray 9×13 pan with cooking spray. Press 2/3 of the mixture into the bottom of the pan. Use either floured hands, or spray your hands with cooking spray in order to press it down without having it stick to your fingers. The layer will be thin. Bake for 10 minutes.

Combine 1/2 cup sweetened condensed milk and marshmallow creme in a bowl and combine until smooth. Stir in PB morsels. No one will tell if you stir in some extras. Spread marshmallow layer over brownie layer in pan. Carefully drop remaining brownie batter by spoonfuls over marshmallow mixture. Bake at 350 for about 30 minutes. Remove from oven and cool before cutting into squares.

Monday, June 20, 2011

World's Best Dinner Rolls

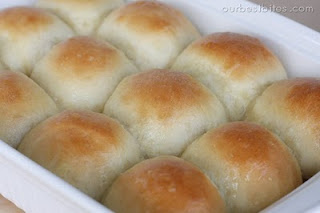
I have really wanted to improve my bread making skills lately and am an avid dinner roll lover so when I found this recipe for the "World's Best Dinner Rolls" on Ourbestbites.com I knew that I had to try it out. I am posting the recipe here but you really should head on over to this site to follow along with the pictures. (That site is where I got the recipe and picture from originally.) I felt a lot better knowing that my dough looked the way it was supposed to.

These rolls turned out delicious. Yes, they are definitely more work that the 30 minute rolls I am such a fan of but they are delicious. Soft and chewy and they turn out HUGE. If you have the time and desire this is definitely a recipe you should try out. I will be making it again!

WORLD'S BEST ROLLS
From Our Best Bites

2 c. whole milk (if you’re in a pinch, you can use 2%, but whole is best. Don’t use 1% or skim)
½ c. + 1 Tbsp. sugar, divided
1/3 c. (5 1/3 Tbsp.) butter
2 tsp. Kosher salt
2 pkgs. active dry yeast (or 4 1/2 tsp.), preferably bread machine yeast
2/3 c. warm (105-115-degree) water
8-9 c. all-purpose flour
3 beaten eggs

Combine milk, 1/2 c. sugar, butter, and salt in a medium saucepan. Heat over medium heat until butter melts.
 
Remove from heat. Allow to cool to lukewarm. This step is really important because if the mixture is too hot, it will kill the yeast.
 
While the milk mixture is cooling, dissolve the yeast and 1 Tbsp. sugar in warm water. Let stand about 10 minutes. If the yeast hasn’t bubbled, you’ll need to repeat this step–moving on with yeast that hasn’t been activated properly will only end in heartache for you.

In a large mixing bowl, combine 3 c. flour and milk mixture. Beat on low for 30 seconds, scraping sides of bowl constantly. Add yeast mixture and beat on high for 3 minutes.
Add beaten eggs. Why should you beat your eggs first? Same reason you should combine your dry ingredients before adding them to moist ingredients when making cookies and cakes–it ensures everything is well-mixed and can be evenly-distributed through your dough or batter. If you add the whole eggs, your dough may not be as consistent.
 
Stir in as much remaining flour as needed to make a soft dough. This dough should be very soft–it will be coming away from the sides of the bowl, but it will still stick to your finger when you touch it. Don’t worry, it will firm up during the rising process. Part of what makes these rolls so good is that they’re so soft and light; if you add too much flour, they will be heavy and dense. Place the bowl in a warm place and cover with a clean towel; allow to rise 1 hour.
 
Punch down dough. Lightly flour your work surface and turn dough out onto surface. Divide in half.

Spray 2 9×13 glass pans with cooking spray. Roll first portion of dough into a rectangle and then cut it into 12 equal-sized pieces. I like to use a pizza cutter because it has a blade on each side, so it cuts right through dough without sticking to the blade. This dough should be very easy to work with, almost like playdough. Shape each piece into a ball and place in prepared pan. Repeat with remaining dough in the second pan.

Cover with a clean cloth and allow to rise in a warm place for about 30 minutes. When dough has about 15-20 minutes to go (depending on your oven), preheat oven to 375.

Bake for 15-18 minutes or until golden-brown.

When done, remove from oven. Rub a stick of cold butter over the tops of the rolls.

TIP! You can also use this dough to make Overnight Cinnamon Rolls or Orange Rolls.

Sunday, June 19, 2011

Breakfast Burritos


There is no breakfast item in this world that my husband loves more than Beto's breakfast burritos. So when it came to, "What do you want for your Father's Day breakfast, honey?" the answer was pretty obvious and simple. I was tempted to find a recipe for breakfast burritos that I could just follow but the idea of adventuring out and doing my own thing won out. And I must say, I feel like I outdid myself. The burritos turned out WONDERFULLY and my husband was so pleased. And if that weren't great enough, they were simple to make and super filling with basic ingredients! Gotta love it!

The recipe below is HALF of what I did. Yes, we had SERIOUS amounts of leftovers. What is listed below could easily feed 6 people. Double it if you want to feed 12.

BREAKFAST BURRITOS
A Shayla Original

1/2 lb. ground pork sausage
1/4 red onion, cut into 1/2 inch slices
2 cups hashbrowns
6 eggs
16 oz jar green salsa
3 large burrito sized tortillas
1 Tbsp. Olive Oil
2 Tbsp. Butter
Cheddar Cheese
Seasoned salt and pepper to taste

Melt butter in a large skillet. Add in hashbrowns. Season with salt and pepper to taste. Cook for 3-4 minutes on medium high heat and then turn by sections with a spatula. Place lid on skillet. Cook 3-4 minutes longer and then turn again. Continue to follow this method until hashbrowns are golden brown on every side.

Meanwhile, in a smaller skillet, heat oil over medium heat. Add onion and sausage. Brown sausage thoroughly and then drain.

Beat eggs in a separate bowl and pour over cooked hashbrowns. Cook for 3-4 minutes and turn by sections with a spatula. Cook another 3-4 minutes. Make sure all sections of your eggs are thoroughly cooked. Gently stir hashbrown and egg mixture to break up the cooked eggs. Try not to decimate your hashbrowns in the process. Add in sausage and onions and mix.

~FOR SMOTHERED BURRITOS~

Preheat oven broiler.

Place 1/2 cup green salsa on the bottom of a 9x9 inch pan.

Place a small handful of cheese on a tortilla and pile hashbrown mix on top. Don't be shy - these things are supposed to be FAT! Add another small amount of cheese on top of mix (or a lot if you are an avid cheese lover.) Fold over short ends and then roll. This may be easier said than done because of how fat these are but just do your best. Top with 1/4 cup green salsa. Place burrito in pan. Repeat with 2 more tortillas.

Top all burritos with remaining salsa and sprinkle with cheese. Place in oven to broil for 2-3 minutes or until cheese is fully melted and golden brown.

~FOR CRISPIER BURRITOS~

Preheat oven broiler.

Grease a small cookie sheet.

Compile burritos the same as you would for the smothered version except instead of topping with remaining salsa and cheese brush each with a small amount of melted butter. Place in oven until tortillas are golden brown. Remove from oven and serve with additional cheese and salsa.

Saturday, June 18, 2011

Baked Tortellini

I don't know how it happened but it seems like all the meals I have planned lately have been from Real Mom Kitchen. She just has a lot of recipes that look good to me I guess!

This recipe was another hit! Super easy to prepare, this rich pasta went a lot further than I was anticipating.

This pasta is not for the feint of heart. Although it is a meatless dish it is packed with cheeses and heavy whipping cream. I tried to lighten it up a bit by using spinach and cheese tortellini and low fat cheeses. I also paired it with a salad with fat free dressing. May as well cut calories where you can!

This entire recipe came together in less than 30 minutes and only has a few ingredients. It would be delicious served with garlic bread as well.

The recipe is courtesy of Real Mom Kitchen and can be found here.

Baked Tortellini
From Real Mom Kitchen
Reminder Recipe! One Year Ago: Sloppy Joes

  • 3 cups or 1 (13 oz) bag fresh cheese tortellini
  • 1  (24 oz) jar of marinara sauce
  • 1/2 cup heavy whipping cream
  • 1 cup fresh grated Parmesan cheese, divided
  • salt and fresh ground black pepper, to taste
  • 1 cup shredded mozzarella cheese
  1. Preheat oven to 350 degrees F and grease an 11 x 7-inch baking pan.
  2. In a pot of boiling water, cook tortellini for 3 minutes.  You don’t want it fully cooked because it will cook more in the oven. Drain and place in a bowl. Toss with 1 tablespoons of butter to prevent sticking.
  3. Combine the marinara, cream, and 1/2 cup Parmesan cheese.  Then add to the pasta and gently toss until coated. Season with salt and pepper if desired.
  4. Place the tortellini into the greased baking dish. Sprinkle with remaining 1/2 cup Parmesan cheese and mozzarella.  Then bake uncovered for 25 minutes at 350 degrees or until lightly browned.

Thursday, June 16, 2011

Lemon Ricotta Pancakes with Blackberry Sauce

What more could you want in life than breakfast for your birthday dinner? I contest there is nothing else you could want! And since it is my birthday today I get to have whatever I want to. I have so many wonderful breakfast recipes that I want to try that it was hard to decide which one I wanted the most, but I cannot kick my lemon craving this pregnancy so this recipe ultimately won out. And it was AMAZING! Don't be afraid of the amount of lemon juice this calls for - it is the perfect amount and they are divine. And the blackberry sauce is a perfect compliment. Serve them up with some sausage and hashbrowns and you may as well die and go to heaven!!!! This is one we will do in our home again and again!

The recipe and picture are courtesy of Real Mom Kitchen and can be found here.

LEMON RICOTTA PANCAKES
From Real Mom Kitchen
  • 1 1/4 cups all-purpose flour
  • 3 tablespoons granulated sugar
  • 2 teaspoons baking powder
  • 1/2 teaspoon baking soda
  • 1/4 teaspoon salt
  • 1 cup ricotta cheese
  • 1 large egg
  • 2 large egg whites
  • 1/2 cup fresh lemon juice
  • 2 teaspoons grated lemon zest
  • 1 tablespoon canola oil
  1. In a large bowl, whisk together flour, sugar, baking powder, baking soda and salt.
  2. In another bowl, combine the ricotta cheese, egg, egg whites, lemon juice, lemon zest, and canola oil.
  3. Gently fold the ricotta mixture into the dry ingredients just until combined. Do not over mix. This batter will be thick.
  4. Heat a griddle or a nonstick skillet over medium heat and coat with canola oil. Drop about 1/3 cup of batter onto the hot griddle or skillet. Cook the pancakes until browned on the underside and beginning to set, about 2 minutes. Flip and cook the pancakes on the other side, about two minutes longer. Continue making pancakes until batter is gone. Serve warm with blackberry sauce. Makes about 10 pancakes.
BLACKBERRY SAUCE
From Real Mom Kitchen
  • 1/4 cup sugar
  • 1/2 cup water
  • 4 tsp cornstarch
  • 2 cup frozen blackberries
  1. In a small sauce pan, whisk together the sugar and cornstarch. Whisk the water into the sugar mixture until well blended. Cook over medium heat until the mixture thickens.
  2. Remove from heat and gently stir in blackberries. Allow the mixture to cool slightly. Serve warm over the lemon ricotta pancakes.
Pancake recipe adapted from Two Peas and Their Pod, Blackberry Sauce recipe a Real Mom Kitchen original

Wednesday, June 15, 2011

Barbecue Chicken and Penne Skillet

If you are in the "small family" position like we are then you probably also frequently have leftovers. Sometimes we do things in completely but a lot of times the meals that I make are just big enough that we have quite a bit to eat for subsequent days. After doing the Throw And Go BBQ Chicken last night we had a lot of chicken leftover and, although it is delicious as leftovers, I saw this recipe in my arsenal and wanted to try it out. I think my favorite part about this rollover recipe is that it is so different from the original. We had BBQ Chicken sandwiches, green beans and mashed potatoes for dinner last night. Tonight we had heaping bowls of this spicy and flavorful pasta with toasted garlic rolls. Yummy!

This recipe comes together so quickly and easily. It is almost a one skillet meal. In the time it takes for your noodles to boil the whole thing will be done. As I said before, it is richly flavorful and spicy. If you are not an avid onion lover I would suggest cutting back on the amount in the beginning because after adding the Rotel and the green onions on top this is quite an "onion-y" dish. Which, of course, we love! I had everything on hand except for the roasted red peppers. They can be quite pricey so I just left them out and didn't feel like the dish was lacking in anything.

This picture and recipe are courtesy of Real Mom Kitchen and can be found here.

Barbecue Chicken and Penne Skillet
From Real Mom Kitchen

·         1 package (16 ounces) penne pasta
·         3/4 cup chopped onion
·         1 tablespoon butter
·         1 tablespoon olive oil
·         2 garlic cloves, minced
·         1 container (18 ounces) refrigerated fully cooked barbecued shredded chicken or 3 cups leftover shredded bbq chicken
·         1 can (14-1/2 ounces) diced tomatoes with mild green chilies, undrained (like Rotel)
·         1/2 cup diced roasted red pepper (optional)
·         1/2 cup beef broth
·         1 teaspoon ground cumin
·         pepper to taste
·         1/4 teaspoon salt
·         1-1/4 cups shredded cheddar cheese
·         3 chopped green onions

1.      Cook pasta according to package directions. Meanwhile, in a large skillet, saute onion in butter and oil until tender. Add garlic; saute 1 minute. Stir in the pork, tomatoes, roasted red pepper, broth, cumin, pepper and salt; heat through.
2.      Drain pasta. Add pasta and cheese to chicken mixture. Sprinkle with green onions. Serves 6-8

 Recipe adapted from Simple and Delicious April/May 2011 issue.

Throw and Go BBQ Chicken

I am always excited to find new crockpot recipes! We have very long days on Tuesdays and unless we want to be eating at 10 pm I have to prepare a crockpot recipe or plan something that my husband can make himself.

I was really concerned about the cooking time for this recipe: 6 hours on high in my crockpot sounded like nothing but burnt chicken to me! I contacted Laura at Real Mom Kitchen (where I got this recipe) and she assured me that that is the correct cooking time.

I went ahead and tried the recipe and cooked it for 6 hours on high. As I feared, the sauce around the edge of the pot burned completely. Luckily, only 1/2 of 1 of my chicken breasts was unsalvageable. The rest were shreddable but very dry. I ended up adding about another cup of BBQ sauce, 1/2 cup of spaghetti sauce and a little more liquid smoke to the cooked chicken. It was still very tasty and my family loved it. My husband "oooohhhed" and "ahhhhhed" through the whole meal.

But it made me wonder, what happened? The only thing I changed about the original recipe was to use Sweet Baby Ray's BBQ Sauce instead of the Kansas City. I looked up the Kansas City BBQ Sauce online and it didn't look like it was exceptionally more liquid based that it would have made that much of a difference.

So I contacted Laura again and asked if maybe my crockpot is just too powerful. She responded:

"Not all crock pots cook the same, unfortunately. Some do cook higher than others. You also don’t want to use a crock pot that is too big. That can cause issues too. Next time, try low for 8 hours. Chicken thighs are also good to use instead. They never dry out in the crock pot. Hopefully this helps, if not let me know."

So now you know! This recipe really is worth giving a try. The combination of spaghetti and barbecue sauces is DELICIOUS. If your chicken happens to turn out like mine just make the adjustments that I did by adding some more sauces at the end.

Thanks so much to Real Mom Kitchen for this recipe, the picture and the advice! Please check out her wonderful site for this and many other awesome recipes by going here.


Throw and Go BBQ Chicken
From Real Mom Kitchen
Reminder Recipe! One Year Ago: Brazilian Lemonade

·         5 boneless skinless chicken breasts
·         1/2 tsp garlic powder
·         1/2 tsp onion flakes
·         1/2 tsp salt
·         1/4 cup brown sugar
·         1 cup spaghetti sauce
·         1/2 cup Kansas City Style bbq sauce (I used Sweet Baby Ray's instead)
·         1 Tbsp. liquid smoke
·         rolls or buns to serve on
·         butter

1.      Place all the ingredients in the crock pot in the order listed above.

2.      Cook in the crock pot on high for at least 6 hours.  Remove the chicken and shred.  Return to the crock pot and mix into the sauce.

3.      Butter the inside of your buns or rolls.  Place them on a cookie sheet.  Broil them in the oven on the second highest level for the oven rack (this prevents burning).  Broil until golden brown.  You want them toasty because this bbq chicken is so moist and saucy you will end up with soggy bread if you don’t toast them.  Sandwich bbq chicken inside toasted buns or rolls.

 Recipe adapted from The Pearson Familee

Thursday, June 9, 2011

Barbecue Beef Cheese Melts

I will admit up front that I wasn't the biggest fan of this recipe - but it definitely has potential to be a lot better. I really liked the roast beef mixture on top but the bread mixture on the bottom was too thick for my liking. It was almost like eating an American version of a Navajo Taco - and I have never been a fan of those. For my taste buds I would prefer a more thin and crispy crust. In fact, next time I make this I will either make this into a pizza or use a pre-refrigerated pizza crust to line the bottom of my pan.

The picture and recipe are courtesy of BettyCrocker.com and can be found here.

BARBECUE BEEF CHEESE MELTS
From BettyCrocker.com
Reminder Recipe! One Year Ago: Taco Rice Bowls

2 cups Original Bisquick® mix
1/2 teaspoon ground mustard
1 cup milk
1 egg, beaten
1 teaspoon vegetable oil
1/2 cup chopped green bell pepper
1/4 cup chopped onion
1 cup barbecue sauce
3/4 lb cooked roast beef (from deli), chopped
2 cups shredded Cheddar cheese (8 oz)


  1. Heat oven to 350°F. Spray 13x9-inch pan with cooking spray. In large bowl, stir Bisquick mix, mustard, milk and egg until mixed. Pour and spread in pan.
  2. Bake 15 to 17 minutes or until toothpick inserted in center comes out clean. (Top will not brown.)
  3. Meanwhile, in 10-inch nonstick skillet, heat oil over medium heat. Add bell pepper and onion; cook 3 to 4 minutes, stirring occasionally, until crisp-tender. Stir in barbecue sauce and beef. Cook until hot.
  4. Spread beef mixture over baked bread base. Sprinkle evenly with cheese.
  5. Bake 4 to 5 minutes longer or until cheese is melted. Cut into squares.
Makes 8 servings

Wednesday, June 8, 2011

No-Roll Mexican Rice Enchiladas

I guess I have been on a meatless/vegetarian kick lately! It is a really nice change to not have to prepare meat to go with our meals and I have enjoyed the lack of meat with the summer heat upon us. Not that I don't enjoy a juicy hamburger now and then and tomorrow we are having barbecue beef (stay tuned!) but my husband grew up not eating a lot of meat so he has been enjoying it as well.

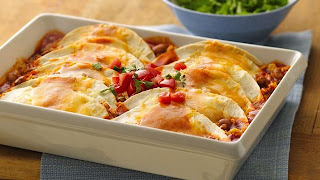
These enchiladas were really tasty and REALLY easy to make. I don't know if there is some secret to Rice-a-Roni that I just don't know but whenever I make it it seems to be less tender than I think it should be. But despite that we still loved this meal. It was flavorful and filling. I even enjoyed the beans and I am NOT a bean person.

The only change I might make next time would be to try green enchilada sauce. Don't get me wrong though - the red sauce was really good! Make sure to check out the tips at the end of the recipe for other changes suggested by Pillsbury.com

This recipe and picture are courtesy of Pillsbury.com and can be found here.

NO-ROLL MEXICAN RICE ENCHILADAS
From Pillsbury.com
Reminder Recipe! One Year Ago: Crockpot Creamy Southwestern Chicken Nachos

1 box (6.4 oz) rice and vermicelli mix with Spanish seasonings
2 tablespoons butter or margarine
2 ¼ cups water
1 can (19 oz) Old El Paso® mild enchilada sauce (red or green)
1 can (16 oz) pinto beans, drained, rinsed
1 can (11 oz) Green Giant® Southwestern style corn, drained
1 package (8.2 oz) Old El Paso® flour tortillas for soft tacos & fajitas (ten 6-inch tortillas)
2 cups finely shredded Mexican cheese blend (8 oz) (I just used normal cheddar cheese)

  • Spray 13x9-inch (3-quart) glass baking dish with cooking spray. In 12-inch nonstick skillet, cook rice and vermicelli with butter over medium heat until rice mixture is golden brown, stirring frequently. Stir in water and seasoning mix from rice box. Heat to boiling. Cover; reduce heat to low. Cook 15 to 20 minutes or until rice mixture is tender. Stir in 1/2 cup of the enchilada sauce, the pinto beans and corn.
  • Heat oven to 350°F. Place about 1/2 cup rice mixture on center of each tortilla; top rice mixture in each tortilla with about 1 tablespoon of the cheese. Fold each in half. Arrange tortillas in 2 rows of 5 in baking dish, placing tortillas open end up, slanting and overlapping. Pour remaining enchilada sauce evenly over enchiladas. Cover tightly with foil.
  • Bake 30 to 35 minutes or until hot and sauce begins to bubble. Uncover; sprinkle with remaining cheese. Bake uncovered about 5 minutes longer or until cheese is melted.
TIPS!

~Enchiladas can be assembled earlier in the day. Pour the enchilada sauce over the enchiladas just before baking. Refrigerate enchiladas and sauce until just before baking. Enchiladas may need to bake 5 to 10 minutes longer.

~One can (15.25 oz) Green Giant® whole kernel sweet corn, drained, can be used instead of the Southwestern style corn. One can (15 oz) black beans, drained and rinsed, can be used in place of the pinto beans.

~One and a half cups finely chopped cooked chicken can be used in place of the beans.

Thursday, June 2, 2011

Penne with Roasted Asparagus (or Broccoli) and Balsamic Butter

Yummy! What a great summer pasta. I really enjoyed the vegetarian change and the opportunity to not have to cut up or cook any meats. Light and flavorful - our whole family loved this one! Even our little 2 year old had an entire bowl to herself. It came together really fast and was so easy to make. We used the broccoli to save some money and it was sooo tasty roasted. I read from another wonderful blogger who tried this one that it isn't good as leftovers. So get hungry, gobble it down and enjoy!

Recipe and picture are courtesy of Mel's Kitchen Cafe and can be found here.

PENNE WITH ROASTED ASPARAGUS AND BALSAMIC BUTTER
http://www.melskitchencafe.com/
Reminder Recipe! One Year Ago: General Tso's Chicken
Reminder Recipe! Two Years Ago: Buffalo Chicken Wing Soup

*Note: If asparagus aren't in season, cut 1 pound of broccoli into small spears for roasting. Toss them with 2 tablespoon oil and ¼ teaspoon each of salt and pepper and roast for about 15 minutes.

*Serves 4-6
1 pound fresh asparagus spears
1 tablespoon olive oil
¾ teaspoon salt
½ teaspoon freshly ground black pepper
½ cup balsamic vinegar
1 teaspoon light or dark brown sugar
1 pound penne pasta
4 tablespoons butter, cut into pieces
1/3 cup freshly grated Parmesan cheese, plus more for serving

Heat the oven to 400 degrees. Snap the tough ends off the asparagus and discard them. Cut the asparagus spears into 1-inch pieces. Put the asparagus on a rimmed baking sheet and toss with the oil and ¼ teaspoon of the salt and ¼ of the pepper. Roast until tender, about 10 minutes. Remove from the oven and set aside.

While the asparagus roasts, put the vinegar in a small saucepan. Simmer over medium heat until the vinegar is reduced to about 3 tablespoons, about 5-10 minutes. Stir in the brown sugar and the remaining ¼ teaspoon pepper. Remove from the heat.

Cook the penne in a large pot of boiling salted water until just done, 11-13 minutes. Drain the pasta and return to the pot. Stir in the butter and vinegar mixture. Toss to combine well. Add in the asparagus, Parmesan, and the remaining ½ teaspoon salt. Serve immediately with additional Parmesan cheese for serving.